 Skip to content
Chair Yoga For Seniors: 5 Best Poses For Better Health

Just because you've reached your Golden Years doesn't mean you can't also participate in yoga. In fact, even 20 to 30 minutes of low impact stretches and postures can do wonders for the mobility and flexibility of seniors. Too many older adults believe that yoga is too strenuous or challenging and avoid taking part, but nothing could be further from the truth.
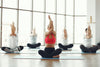
It's just as important for seniors to stay active as it is for everyone in order to remain healthy and happy. Yoga can be an essential component of a smart fitness regimen for seniors and one of the most popular routines around is Chair Yoga. This is something you can do in the comfort and privacy of your own home, since there is no need to go to a yoga studio or gym to practice Chair Yoga.
Related: What Is Restorative Yoga?

Take Precautions
With any type of fitness activity, it's extremely important for seniors to be careful. Safety and comfort is paramount and as a senior or a caregiver, it's critical to prevent overexertion and potential injury from the practice. Performing the poses and movements associated with Chair Yoga should never be painful. Therefore, if any pain or discomfort starts to occur stop doing the routine immediately.
When starting out practicing a Chair Yoga routine for seniors, always take it slowly. Nothing should be too difficult and, if it is, slow down and step back from the current posture. Always listen to what the body is saying or warning against, and if it feels wrong then stop. Even performing a portion of your routine is better for you than not doing any exercise at all.
When seniors maintain some level of consistency with a yoga routine like Chair Yoga, they will soon find that it's not only easier to perform every movement and posture but their flexibility will improve as a result. But don't worry too much about the level of flexibility a senior has or does not have prior to starting a Chair Yoga routine. This type of yoga is designed for beginners who want to get some activity without the intensity.
Talk To Your Doctor
A senior who is ready to embark on any type of fitness routine should talk to his or her doctor first. Having the input from a primary care physician on the do's and don'ts of developing an exercise regimen will help to avoid pain or injury and make the fitness routine more effective. A doctor will also recommend which movements or poses are beneficial and which ones to stay away from or modify so as to prevent injury or further exacerbating a current medical condition.
This shouldn't deter any senior from participating in yoga. This form of activity is not dangerous for most seniors, however, a medical professional can better illustrate any obstacles or hazards to navigate.
Once you’ve spoken with your doctor and you're ready to get started on developing better flexibility, greater mobility, and less pain in your joints, here are some of the most popular and highly effective Chair Yoga postures to try.

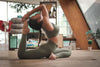
Chair Yoga Postures
No yoga mat necessary, these poses can be done on almost any chair. The only requirements are that it's a secure and reliable piece of furniture and the both are feet touching the floor when seated. Feel free to use a strap or even a regular belt is fine to help assist in stretching and reaching.
Seated Mountain Pose
This is the seated version of the traditional Mountain Pose. It's the easiest of the poses to perform as it entails sitting in a chair and focusing on your breathing while staying in place. Sit up straight, both feet firmly planted to the floor. As you breathe in, lengthen the spine with your feet rooted into the floor in front of you. On the exhale, pull your belly inward while rolling your shoulders back and down. Do this three or four times.
Keep in mind that Seated Mountain Pose should be your go-to pose if you ever need a respite from your routine. Remember, if you feel any pain or you're tired, take a break and return to Seated Mountain.
Seated Eagle Pose
Begin Seated Eagle by starting in Seated Mountain. Place the ankle of your right leg over the ankle of your left while straightening both arms before bringing your left arm on top of your right arm. Bend the arms upward so both hands are pointing to the sky. You have a choice as to how you hold your hands - they can be kept with the backs touching or cross them so the palms touch instead. Stay in the pose for three inhales and three exhales before slowly releasing your hands and arms and putting them at rest on your thighs. Repeat two or three times.
Seated Warrior One Pose
While remaining seated, inhale and lift the arms out from the sides before bringing them both all the way up and holding them above the head. Stay in that position for five breaths. If you're having trouble keeping the arms up in position, interlace the fingers together to reduce some of the tension you're feeling. Hold your head in place while staring ahead. You may feel inclined to look up, but don't. After your fifth breath, exhale and bring the arms down to your sides.
Eagle Arms Pose
Staying seated, inhale and bring your arms up so they are stretched out straight. Exhale and swing them around in front of you all the way around, right under the left, until your hands reach the shoulders and you are left holding yourself in a tight hug. Inhale and bring your elbows up a few inches higher then they are at the present. From there, exhale and relax and roll your shoulders away from the ears. Take two or three breaths and repeat lifting the elbows and rolling the shoulders. After multiple repetitions, release the arms back to your sides.
Seated Twist Pose
Seated Twist Pose required more caution than the previous poses mentioned. While a twist pose is excellent for helping digestion and blood circulation, it can also put you at a great risk for injury if you go too far or force the body into an uncomfortable position. So make sure you don't use the chair to assist your twist because you could end up putting your body at risk.
Keeping that in mind, you can perform the Seated Twist starting with an inhale as you lengthen the spine and raise the arms from the sides and lift them up. Exhale and twist, gently, to the right with the upper torso. Bring the arms down, allowing your right hand to reach the top of the chair for support and the left hand to fall to your side. Turn your head to look over the right shoulder and hold but do not pull on the top of the chair. Hold for five breaths before releasing the pose and moving to a natural, forward-facing position. Repeat the pose on the left side next.

Final Thoughts
Chair Yoga is a great way to get in exercise at home. But when you do, feel free to have someone along to instruct as you get in and out of the poses. You can also practice on your own using these instructions. Just be very aware of your body and do not ignore any warnings it might be giving you. If you are experiencing fatigue or any discomfort in the body or joints or you simply feel a headache coming on, give yourself a chance to rest. Always work at the pace that is comfortable for you, and do not feel like you need to overdo it for any reason. If you do feel any pain or discomfort, release the pose slowly and gently and do not resume until it has fully passed
For more information on types of yoga, check out the Yoga Society blog.


Great article!
Leave a comment